The advanced section takes a deeper look at the topics already mentioned in the Beginner’s Section. This Section has Seven Chapters, each touching on one specific stage of drawing realistic images. Throughout the chapters, you will find illustrations to portray what is being discussed in that specific Chapter.
Tips and Tricks to apply to your drawing to achieve realism can be found throughout the Chapters. Keep in mind that the results can be achieved by practicing and applying what knowledge to your drawings, that is the only way you can learn effectively.
Drawing an eye or any other object takes skill to reflect realism at different levels. Once you master the skills to draw accurately, you start to notice differences in shades of light, the continuity of different shades of contours, and convincing perspectives. This does not go without paying much attention to selecting good papers.
Just like a Chef, an Artist needs to know what is near and dear to their craft, the tools they use, and what works well and produces results that are incomparable to others. In your journey to becoming the best Photo Realistic Artist, you will find answers to these questions, you will know what kind of pencils or papers you work best with.
Back to the Chef analogy, drawing a realistic image takes the ability to know what kind of pencils work well with what type of Drawing Paper. In addition to finding a good paper, an extra step will be to find what kind of pencils really produces the kind of effect when working with the specific Drawing Paper.
Let's take a look at the image below and see what could go wrong when a non-suitable paper is selected for drawing. The tools used in the drawing below are:
1. Standard Printing paper (A4)
2. HB Pencil (Only one pencil used)
3. Standard Eraser found in the store (Not specifically made for Pencil Artists)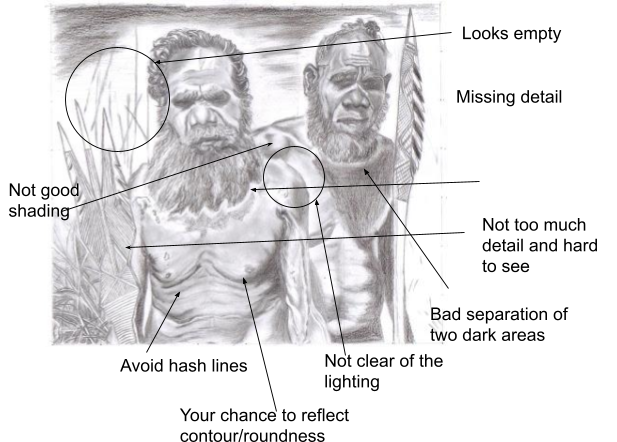
Figure A1
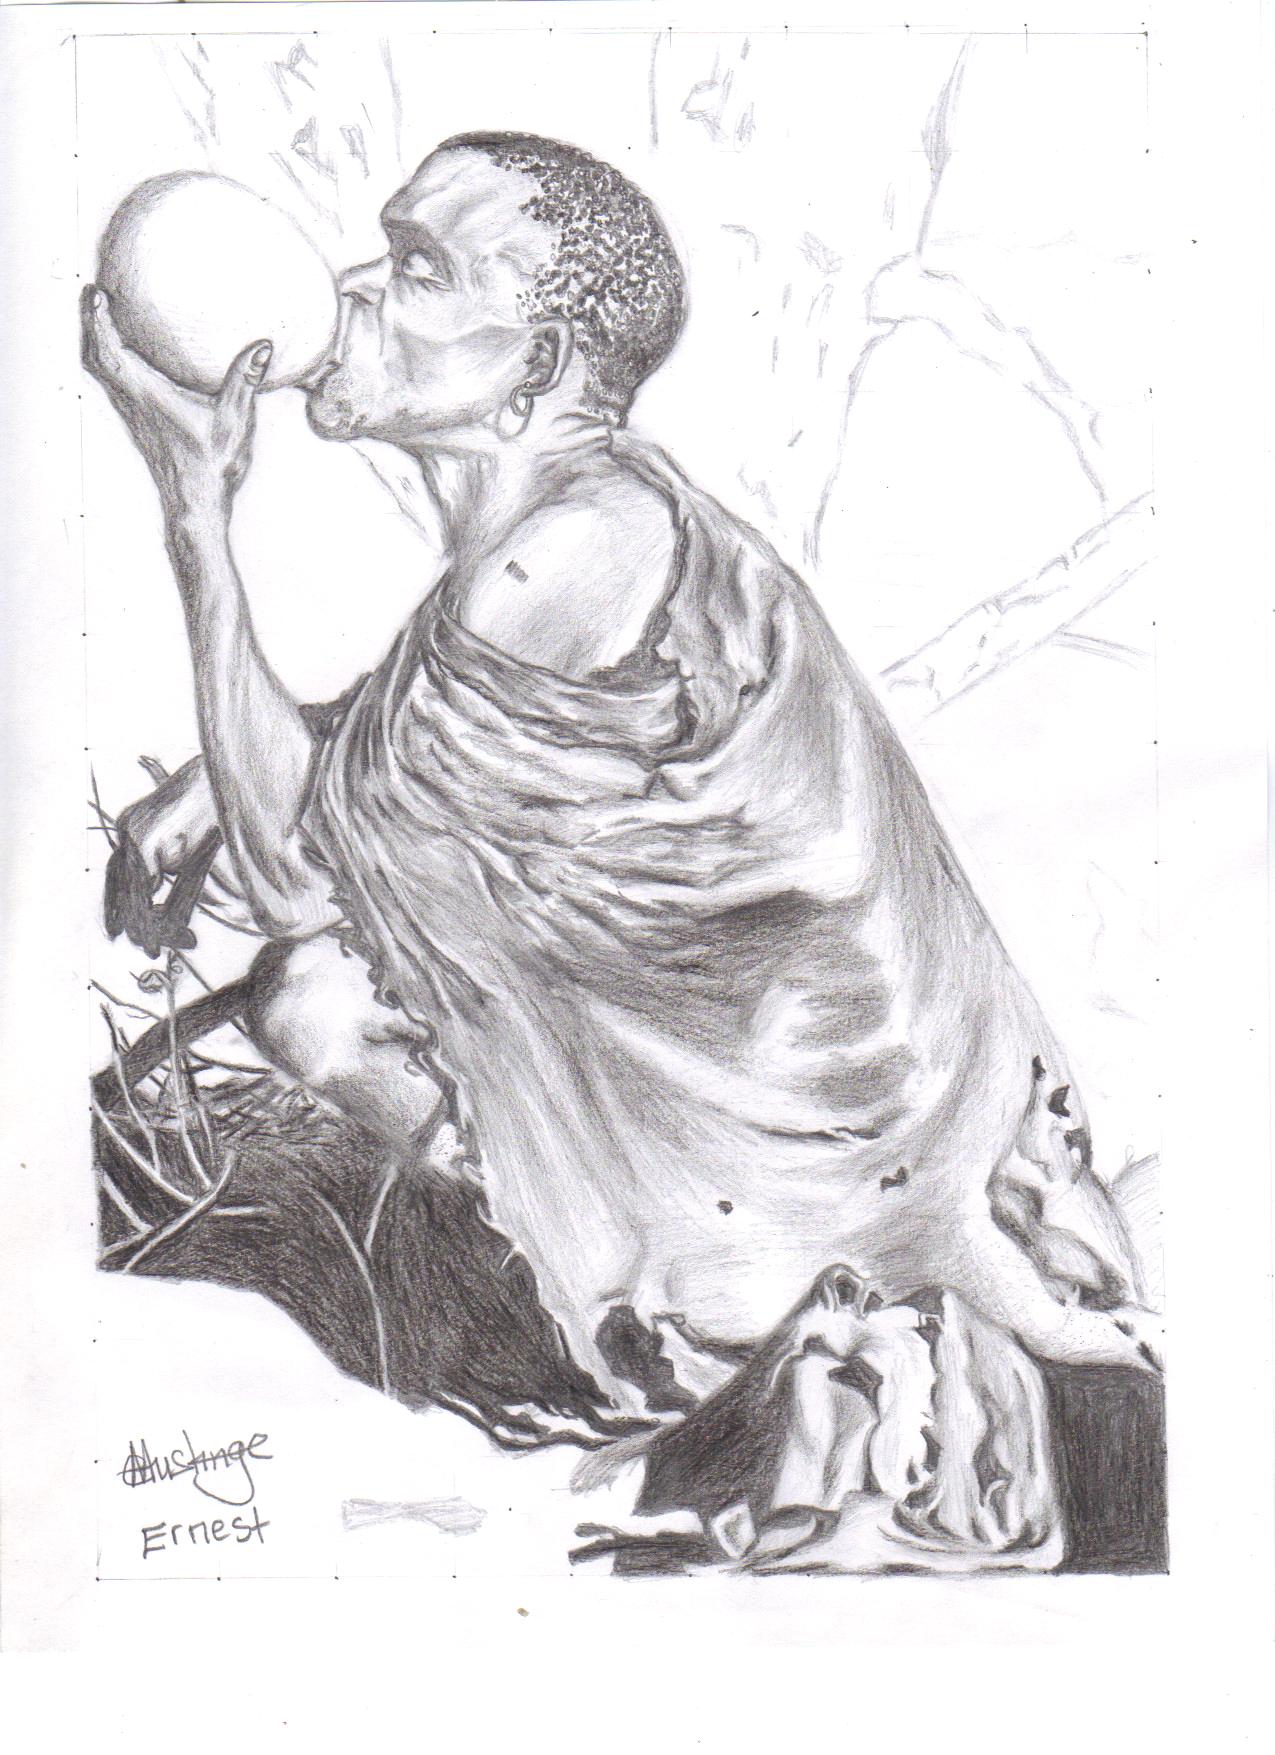
Figure B1: Drawing of the San People of South Africa drinking from an Ostrich Egg
Paper: A4 Printing Paper: Pencils: H1,H2,HB,B2,B4
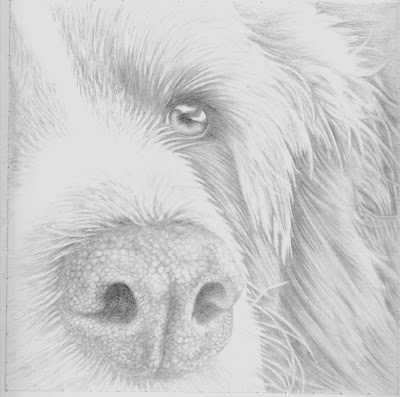
Figure C1: Uncomplete Drawing of a Dog's Face: Pencils: H1
1. You are struggling to draw light strokes
2. When you erase not all graphite come off the paper quickly
3. When you come back to the drawing, you seem to notice the drawing is losing detail.
4. The paper is glossy or has a shiny surface that prevents you from fully producing enough value
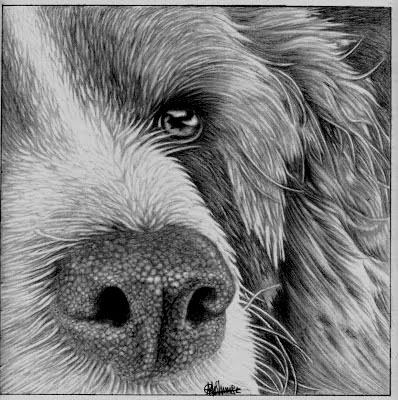
Figure C2: Complete Drawing of a Dogs Face : Pencils: H1, H2, HB, B1, B4
When finding a good paper, keep in mind the kind of paper that would allow you to erase the mistakes and not leave dark marks. For Example one of the important steps in the drawing is visualizing the dark and light spots and identifying challenges then quickly coming up with ways to address them.
The rule of thumb will be to start drawing lightly with strategic and tempered lighter strokes of pencils on the paper. The way you could tell the good paper would be forgiving to erase and flexible to draw without applying too much pressure. The Good paper would have a textured surface to it, other paper would have differently textured and untextured surfaces on both sides.
Artists practice hard and know the tools they need to accomplish their job. It is important to at least familiarize yourself with different drawing papers and different sets of tools. There are more papers that are intended for different types of art and are bound to produce different results. As a beginner, If you want to draw a realistic eye or any other object, it is important to be aware of different textures of paper and what kind of art is best suited for that kind of paper.
drawing is by practicing drawing.
When you practice drawing, try to stick to one drawing that you started and make it perfect, only when you reach that level, try to build the habit of keeping what works for you. For example, if you find a pencil that really makes your drawing look good, keep it nice and safe.
[Note] For example, when I started drawing an eye, I decided to draw on a Bristol Vellum Strathmore paper because of its two different surfaces. One surface or side of a paper has a smooth touch and the other has a rough touch.
The rough side is good for drawing textured figures like an Orange, a Dog’s nose, or a rock, while the other smooth side is best for drawing objects like portraits, flowers, baby faces, and many others.
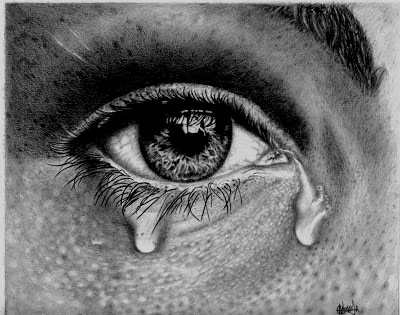
Figure D1: Complete Drawing of an Eye: Pencils: H1, H2,HB, B2,B4: Eraser: Kneaded Eraser
In this chapter, we talked about the importance of planning before you start drawing, when you start drawing, keep in mind that the drawing can be improved upon in the next session of drawing.
Look at it like a work in progress, every time you work on the same drawing you start to notice mistakes that will lead you to correct them. When you get into the rhythm of noticing mistakes and correcting them in the next drawing session, you start to develop skills of perfection.
We also took a hard look into the topic of knowing how to choose a good Drawing Paper. We learned that choosing a good paper is equally important if not the most important step to take when drawing a realistic image.
When you use an A4 Printing Paper that is slightly glossy (not necessarily drawing paper) some small mistakes might occur. The image below lacks detail, this could have happened because the graphite could not stick to the paper. It also seems as if the Artist struggled to maintain continuity ( bridging two shaded areas together without the human eye noticing where one shade ends and another start). Choosing the wrong paper might ruin the drawing, all the hard work put into bringing the drawing together might not be worth it.
When working with a paper that seems to be less flexible to draw lines, keep in mind the technique to draw light (not too dark) lines, start with drawing the light strokes then move on to darkening the strokes. Think about whether the graphite will stick to the paper for a long time if the drawing is left out without fixatives ( protective spray that protects the graphite or drawing from losing value or detail ).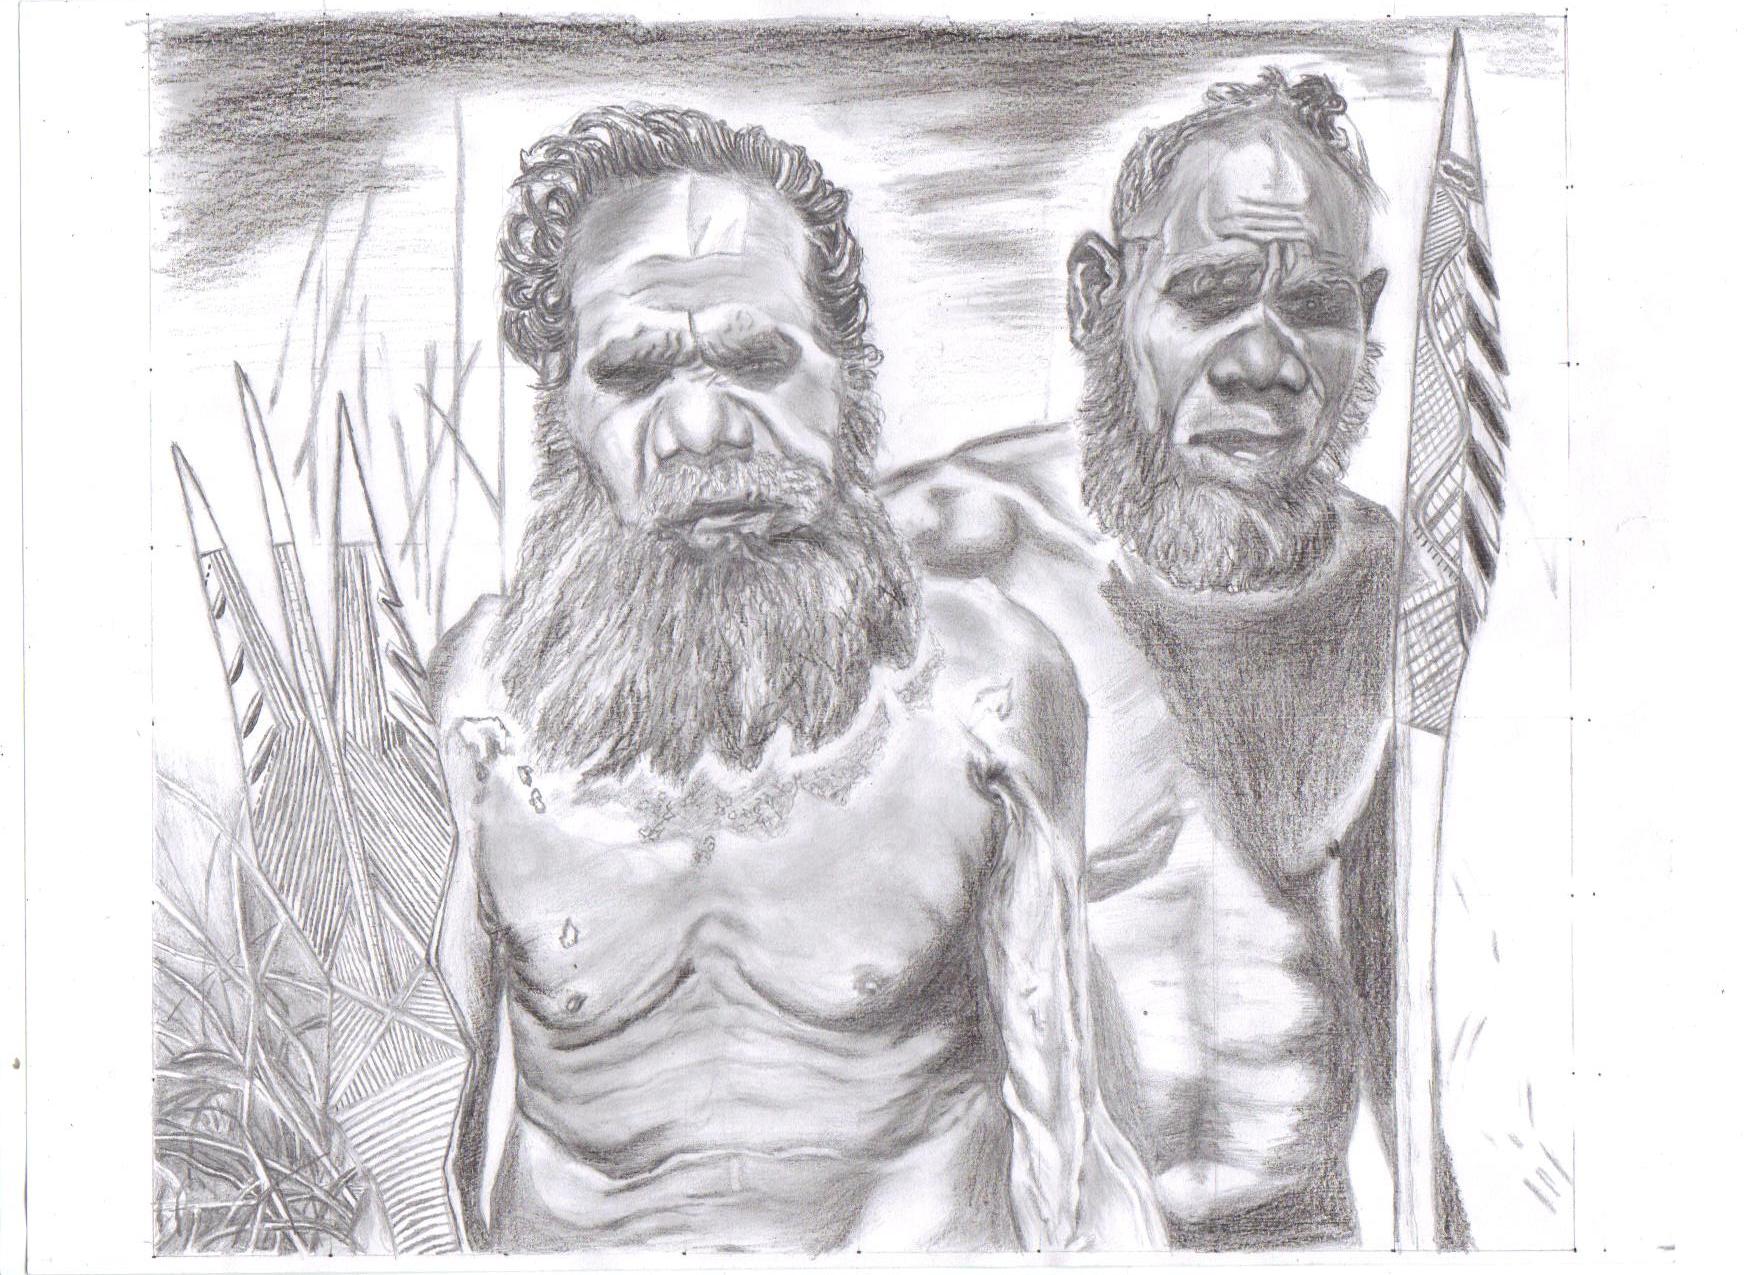
Figure A2: Drawing of indigenous people of Austria: Pencils: H1, HB, B2, B4
Login to Continue, We will bring you back to this content 0