Outlines are the initial lines of shapes an Artist draws when creating the structure of the Drawing. There are skill sets required to lay down really good outlines that determine how similar the drawing would turn out to be by recreating the shapes of the reference image. Don’t worry too much about this stage in drawing, outlines can be fixed and corrected as the drawing matures, just keep in mind not to introduce wrinkles or dirt when erasing mistakes on the Drawing Paper.
Sometimes experienced artists can bring a drawing to life* even without having an outline accurately drawn down onto the paper. Not to say that all artists follow the same path to drawing by first outlining the shapes of the object but knowing this step will help master one of the critical stages of a Drawing.
Free-Hand Drawing is when an Artist draws from observation, normally without some sort of method applied to how the drawing is produced.
It is a hope for many artists to be able to draw freely but acquiring this skill takes more practice and mastering techniques to correct mistakes. One of the techniques to correct the mistake when one is made is by starting out with lighter outlines.
Start by drawing really light strokes of the outline then gradually work yourself to make them visible to the human eye. This could be worked upon in layers or could darken the lines at one. My advice will be to first draw the subject with lighter pencils and after the subject is visible to you (An Artist) then you can work on darkening the outlines.
Drawing Outlines from a Grid-Method
As a beginner, it is important to get the outline of a drawing as accurately as possible because the whole drawing will be based on that outline.
In other instances when an artist doesn’t need an outline to draw a realistic picture, all they need is a reference photo or even imagination to draw.
As mentioned earlier, if you need a method to guide you to achieve great accuracy then Grid-Method will help you get the right perspective. We will look into Grid-Method in Chapter 7.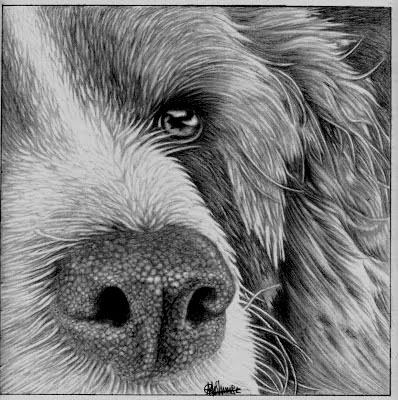
Figure I1
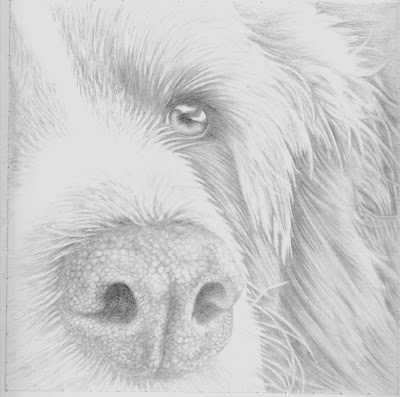
Figure I2
It is important to know at this level that a good outline can be achieved by drawing light strokes of pencil on the paper. When outlining, make sure not to damage the paper by drawing hard lines as it becomes convoluted to erase hard lines and might end up damaging the paper.
[Tip] Don’t forget to plug the earbuds/headphones in and listen to your favorite music while you outline the image. This will put you in the right mood and enjoy the process.
Below are steps to consider when making an outline
Outlining is very important because it lays down the structure of the drawing. Getting this stage of drawing right will help you head in the right direction when drawing a realistic image. If you find yourself struggling to agree on whether the outline is good enough or not, remember outlines can be corrected at a later stage in the drawing.
The most important takeaways are not to damage your paper by drawing hard strokes and be patient enough by understanding the outlines cannot be as the reference image itself (The Outline will always be an outline, that is what makes a drawing admirable). Keep it clean and lighter, that way you can add pencil graphite to your outlines in layers.